Monday, April 13, 2009

Pavlova with Lemon Curd and Berries

For Easter this year, I decided to try out a recipe from Gourmet Magazine. We already had a chocolate dessert in the works so I wanted something a bit lighter. I came across a recipe for Pavlova with lemon curd and berries and decided to give it a shot. The original recipe can be found in the April 2009 edition of Gourmet on page 86. I, however, have some tiny changes to the recipe that I want to share with you that I think will produce an even better pavlova. If you don't know what a pavlova is, you're not alone. I was clueless until a friend made it for us awhile back. Basically, a pavlova is a bed of baked meringue that has some sort of custard or sauce on top and then berries on top of that. It's light and sweet and perfect for the summer. Below is my version of the Gourmet Pavlova.


For Meringue:

1 cup granulated sugar
1 Tbsp cornstarch (mix this in with the sugar before you begin)
3 large egg whites room temperature (save the yokes for the filling)
1 tsp white vinegar (I used coconut vinegar, not sure if it made a difference or not)


For Filling:

2/3 cup granulated
1 Tbsp cornstarch
pinch of salt
1/3 cup fresh lemon juice (about 1 1/2 lemons)
1/2 stick unsalted butter
3 large lightly beaten egg yokes
2 tsp grated lemon zest
1 cup heavy cream
4 cups mixed berries (I used strawberries, raspberries, and blackberries)

Making the meringue:

Preheat the oven to 300 degrees. Using a piece of parchment paper, trace the face of a plate or cake platter that you plan to put the pavlova on. A regular dinner plate would make a good size. Beat together the salt and egg whites on medium speed until they form soft peaks. Next add the water and beat until the egg whites hold soft peaks again. Next, on medium-high speed slowly add in the sugar and beat 1 more minute. Lastly, turn to high speed and beat in the vinegar until meringue is glossy and holds stiff peaks (this takes approx. 5 minutes). Once done, spread the meringue out on the parchment paper in the size of the circle you traced, mounding up the sides more than the middle to create a place for the berries to lay. Bake in the oven about 45 minutes. After 45 minutes, turn the oven off and prop the door ajar and let the meringue cool inside for an hour.

Make the lemon curd while the meringue is cooling:

stir together the sugar, cornstarch, and salt in a 2-qt heavy saucepan. Next add the lemon juice and butter. Bring to a simmer and whisk constantly for about a minute. Mix in 1/4 of this mixture with the egg yolks. Take the mixed yolks and pour them into the saucepan. Reduce heat to low and cook, whisking constantly, until curd is thick (about 2 minutes). Don't let curd boil. After 2 minutes transfer the curd to a bowl and mix in the lemon zest. Cover the surface of curd with plastic wrap or parchment paper and let cool in fridge for about an 1 1/2 hours.

Assembly:

Beat the heavy cream until it holds still peaks, then fold it into the lemon curd. Spoon lemon curd into the meringue and mound the berries on top.


You can eat the pavlova right away but from my own experience it tastes better if you refrigerate covered overnight. The meringue becomes more marshmallowy and the flavors have time to blend.

An Indian meal from Sabrina!

The following is from my dear friend, Sabrina, who was my accomplice in so many things in Paris, including many, many meals of delicious Indian food. I was usually in charge of the Saag/Palak Paneer and chai.

She just sent me the following--her first addition to the blog! Have fun!

Welcome to the Sidhu household where the food is normally very healthy, not spicy and relatively easy to make. Not the typical Indian story right...but ours is not the typical Indian household. We have travelled all over India and lived in so many different states that one loses count. We constantly had to move, pack, unpack, and had little time for details. Plus some healthy food was always required since we were subjected to changing cuisines, which were often greasy and spicy. Our stomachs needed an anchor! So food had to be easy, quick and healthy. The Curd Chiken curry is a signature dish from the Sidhu household, one that my mom taught me before I left for Paris. She also taught me Aloo Zeera since I insisted that I needed to know more "easy" dishes if I had to play host and invite people over. So if I could do this, so can you.

Here are some easy recipes and you can thank my mother for them!

Curd Chicken
Chicken 1 kg
Garlic    11/2 pods
Ginger    1 piece
Curd/ Yogurt  1/2 kg; 2i/2 cups
Salt 1 heaped tsp
Pepper , turmeric 1/2 tsp each
Coriander powder 1 tsp
Red chilly powder  1/2 tsp

Mix the chicken with curd ( beat the curd so it is smooth) and add the following: oil or butter; ginger/ garlic (in paste or pieces), ; turmeric; salt; nutmeg; pepper; red chill powder( if you want it spicy)  coriander (powder or whole), cardamon (powder or  whole), cinnamon (powder or whole)

Leave this to marinate for about 4 hours in the fridge or even overnight. The longer you marinate it , the better. Make sure you make small cuts in the chicken pieces so the marinade can soak in. The chicken could be boneless or with bones but should be in small pieces.

Cooking: Heat some oil in a pan, and add the marinade and cook till the chicken is tender and the water has evaporated. Voila! Curd Chicken  is ready :)

Eat the curry with some basmati rice.

If you really want to be fancy, then you can add a third dish : Raita-  Take some curd, beat it and add chopped tomatoes , salt and pepper. The curd normally has a cooling effect if the chicken is spicy.

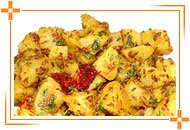
If you want to show off, then you can make Zeera Aloo or Cumin Potato which is also very easy to do. Boil potatoes, peel the skin, and cut into small square pieces. Then in another dish, heat some oil, and add cumin and garlic. Let that cook, and then add onions and cook. Add turmeric and salt and pepper. Then add the potatoes and mix. Garnish with coriander.


You don't need any special ingredients except the turmeric & coriander powder ...which should be readily available at the local grocer. The others (cardamom, cinnamon, nutmeg) should be readily available anywhere. If you cant find coriander powder, you can use fresh coriander.

So now your meal is: CURD CHICKEN; BASMATI RICE; RAITA; ALOO ZEERA


Enjoy cooking! Hope it turns out well :) Send me some photos!

Wednesday, April 8, 2009

The Neiman-Marcus Chocolate Chip Cookie Challenge

Ever heard the story of the Neiman-Marcus cookie? No? Well, the website Snopes.com sums it up like this:

"Neiman-Marcus charged a shopper $250 for its cookie recipe, not the $2.50 the woman had been expecting to pay. As revenge on the store for refusing to reverse the charge, she now provides the recipe for free and exhorts others to pass it along."

Long since proven as an urban legend, the cookie story still gets passed around the internet along with the "infamous" recipe. Neiman Marcus on their website sums it up like this:

"An urban myth is a modern folk tale, its origins unknown, its believability enhanced
simply by the frequency with which it is repeated. Our signature chocolate chip cookie
is the subject of one such myth. If you haven't heard the story, we won't perpetuate it
here. If you have, the recipe below should serve to refute it. Copy it, print it out, pass it along to friends and family. It's a terrific recipe. And it's absolutely free."


Well, with Neiman-Marcus providing a true N.M. recipe and with the endurance of the urban legend I thought it would be a fun idea to bake the two cookies and put them to the test. Which cookie was better? The real Neiman-Marcus cookie or the urban legend Neiman Marcus cookie.

Both recipes were fairly simple (I provide each one at the end of this post) and I was able to make both the same night. It should be noted that the urban legend recipe contains a lot more ingredients and is more of an oatmeal/chocolate chip cookie than the real N.M. recipe which is a twist on the classic c.c. cookie. These differences make it a bit harder to compare but we were up for the challenge.

The Urban Legend cookie's (ULC) dough was much more interesting than the Real Neiman-Marcus Cookie (RNMC) and in my opinion tasted better. The texture was great and the dough very thick (don't attempt to make the ULC with a hand mixer!). However, the RNMC had the most wonderful smell while cooking. It was similar to a chocolate chip cookie smell but more intense and just awesome. The appearance of the two after they were done baking was totally different. The ULC was more of a home-made rustic look while the RNMC were more sleek and traditional looking (but still a darker color than a traditional c.c. cookie). It's hard to judge which one looked better but they both looked delicious and I think it depends on type of look your going for.

As for the taste (which is what we utimately judged the cookie on), we brought the cookies to about a dozen people without telling them which cookie was which. What were the results? Split 50/50. Some people loved the oatmeal and nuts in the ULC while others felt that those ingredients didn't belong in a real chocolate chip cookie. The people who liked the NMC best all said it was more buttery and if they went and bought a cookie at N-M then this the NMC is what they would expect to get. Overall, everyone really loved both cookies but most people agreed that the real Neiman-Marcus cookie belonged at the store.

Recipes:


Urban Legend Cookie Recipe:


Ingredients


1 cup butter
2 cups flour
1 tsp. baking soda
1 cup sugar
2 1/2 cups blended oatmeal (measure oatmeal and blend in a blender to a fine powder)
12 oz. chocolate chips
1 cup light brown sugar
1/2 tsp salt
1/2 of an 8oz. Hershey Bar (grated)
2 eggs
1 tsp. baking powder
1 1/2 cups chopped nuts (your choice but I used walnuts)
1 tsp. vanilla


Directions

Cream the butter and both sugars. Add eggs and vanilla; mix together with flour, oatmeal, salt, baking powder, and baking soda. Add chocolate chips, Hershey Bar and nuts. Roll into balls and place two inches apart on a cookie sheet. Bake for 10 minutes at 375 degrees. Makes 66 cookies.


The Real Neiman-Marcus Chocolate Chip Cookie Recipe:


Ingredients
1/2 cup (1 stick) butter, softened
1 cup light brown sugar
3 tablespoons granulated sugar
1 large egg
2 teaspoons vanilla extract
1-3/4 cups all purpose flour
1/2 teaspoon baking powder
1/2 teaspoon baking soda
1/2 teaspoon salt
1-1/2 teaspoons instant espresso coffee powder
1-1/2 cups semi-sweet chocolate chips


Directions
1. Preheat oven to 300 degrees. Cream the butter with the sugars using an electric mixer on medium speed until fluffy (approximately 30 seconds)

2. Beat in the egg and the vanilla extract for another 30 seconds.

3. In a mixing bowl, sift together the dry ingredients and beat into the butter mixture at low speed for about 15 seconds. Stir in the espresso coffee powder and chocolate chips.

4. Using a 1 ounce scoop or a 2 tablespoon measure, drop cookie dough onto a greased cookie sheet about 3 inches apart. Gently press down on the dough with the back of a spoon to spread out into a 2 inch circle. Bake for about 20 minutes or until nicely browned around the edges. Bake a little longer for a crispier cookie.

Yield: 2 dozen cookies

Tuesday, March 24, 2009

Napoleons (Mille-Feuille)


I've always wanted to attempt it and finally, last night, I did. I made a Napoleon! For those of you who don't know, a Napoleon (or a Mille-Feuille in French) is a dessert made of 3 apricot-glazed layers of puff pastry with custard sandwiched between. On top is a white pastry fondant glaze with wavey decorative chocolate stripes. In other words...it's delicious but a bit complicated to make at home. Starting at 7pm and ending at around 10:30pm (only the French would create a dessert that uses puff pastry and then demands that you make sure it does not puff) it was a difficult but fun task. I'm glad I finally tried doing it but I think from now on, I'll buy these tasty treats from the bakery.


Sunday, March 22, 2009

Elephant Ears (Palmiers)

Here is a relatively cheap and easy dessert you can make that looks impressive and tastes great. Elephant Ears or as the French call them Palmiers, taste a lot better home-made than store/bakery-bought. You can be daring and try to first make the puff-pastry dough required or for $5 buy some at the store (which is what I did). Below are directions using store-bought puff pastry dough:


(One sheet makes about 14 cookies. Two sheets come in a box normally)

1. If frozen, defrost pastry sheet for 40 minutes
2. Lay down a thick layer of sugar on your counter, enough so that your whole pastry sheet can lay on top.
3. Using a rolling pin, roll the dough with enough force to encrust the bottom of the pastry sheet with sugar.

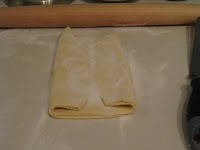
4. Next, fold the bottom half of the sheet of dough up to the middle, then fold the top down, overlapping it (Julia Child astutely notes you should do it just like you would fold a business letter).
5. Turn the sheet of dough so the top flap is facing your right, and repeat the Business fold again.
6 Roll the dough out now about 8 inches long. Then turn the dough and roll it out 8 inches long the other way to form a rough square.

7. Trim the dough sheet to make it a more perfected square.

8. Fold each side of the square in so that they almost meet in the middle. Sprinkle sugar over the whole thing again and use the rolling pin to encrust the dough with the sugar a bit.

9. Fold the whole thing in half (like you are closing a book) and use the rolling pin again to press down firmly so the layers stay together.

10. Cut the "log" you have created crosswise into 3/8" thick pieces.


11. Place on a pastry sheet on a baking tray 3 inches apart keep a "V" shape.


12. Refrigerate for 30 minutes to let the dough set. Preheat the oven to 450. Make sure the rack is in the top middle of the oven.


13. After 30 minutes, bake (one sheet at a time) for 6 minutes or until the sugar on the bottom begins to caramelize.


14. Take out of oven, quickly flip over and lightly cover the top-side of the cookies with sugar.


15. Put back in oven and bake another 3-4 minutes, or until tops of cookies are golden-brown in color and the sugar is caramelizing nicely.


16. Let cool on a wire rack. As the palmiers cool, they will harden and make a nice sweet crunch.

Thursday, March 19, 2009

White House Vegetable Garden!


I say, "Brava!" to the First Lady for her latest project to plant a vegetable garden in the White House lawn. What a good example she is setting for the country!

Check out the NYT article here:
http://www.nytimes.com/2009/03/19/dining/19garden-web.html


Photo credit: whitehouse.gov

Tuesday, March 10, 2009

Julia Child in Paris

For all you Julia Child fans out there...

Bryan and I decided to scope out some of Julia Child's old haunts in Paris.


In her book, "My Life in France" she talks about her flat that she lived in. Located at 81 Rue de L'Université (which Julia shortened to 81 Rue de Loo), Julia and her husband, Paul, lived in the top two floors of the old building. Here is where Julia first began to test recipes for her cookbooks and to learn the French styles and techniques that she would eventually bring to America. It's sad to note that there is no historical plaque on the building and the residents that live there now have never even heard of Julia Child (we asked). While Julia is a huge celebrity in the States, nary a French person outside of the culinary world (that we spoke to, at least) knew of her in Paris.


E. Dehillerin was Julia's favorite kitchen/cooking
supply shop. Located in Les Halles, right by the
famous "Au Pied de Cochon" restaurant, E. Dehillerin's has just about everything a chef would need. It has two floors of kitchen gadgets from a basement filled with copper pots to a wall filled with whisks (or wire whips, as Julia would say!). The prices are all listed in a book that's located in the front of the store. It was great walking around this place, we could see why Julia was in love with it.

Monday, March 9, 2009

Paris


Last time I came back from Paris, I vowed to make my next trip all about the food. Well, Bryan and I just returned from our trip overseas yesterday and I have to say, I kept my promise! Below are some pictures I snapped along our culinary adventure. They are a bit heavy handed on the sweets but that's just my taste buds interfering with good "journalism". Enjoy!

Two baguettes: On the left, a "Traditional" baguette, on the right a "Rustic" baguette. The rustic baguette uses a darker flour and has a deeper and more rich flavor than the Traditional but I think they're both delicious.

The cheese is cheap and comes in a ton of varieties in France. America does not have anything that compares. Most of our imported cheese has already been sitting too long and you don't get the same taste as in a French market but you pay twice the price.

This cheese is called Morbier. There is a thin layer of ash in the middle of the cheese which harks back to a fun story of how the cheese was first made. A French woman would milk her cow first thing in the morning and then use the milk to make the cheese. She would cover the top of the cheese with ash so it wouldn't spoil from the air. In the afternoon, the French milk maid would milk her cow again and place that layer on top of her first layer. It's a cute little story and I was happy they still carried on the tradition. The cheese is a more mellow French cheese and absolutely delicious.


More cheese! This was only 1/5th of the varieties at one local market.


Here a French man lays out his seafood products on a busy sidewalk for people to buy. This is a typical scene in Paris. Fresh food daily.


Okay, so I admit it. I became OBSESSED with pastries. We were staying close to a two famous bakeries in Paris: Pierre Hermes (known for their French Macarons) and Gerard Mulot (a chocolatier but also my favorite pastry and bread-maker).

Cakes from Gerard Mulot

A cake from Gerard Mulot that I actually got to eat!


Gerard Mulot also had some amazing main courses. Take a look at that Coulibiac...the artistry involved in creating that pattern out of pastry...incredible!


This dessert cost me 4 Euro (roughly 5 bucks) but it was worth every cent. Raspberries laid on top of a column of cassis (A Eurasian currant (Ribes nigrum) bearing black berries) mousse that sat on top of a layer of dark chocolate which sat on top a layer of crunchy puffs with a drop of honey. French macaroon halves speckled the outside and a slice of apple was hidden inside on top of the dark chocolate layer. Simply heaven.


Pastry from a random bakery


More random pastry

A window display at Pierre Herme (the Louis Vitton of French Macarons) . These display macarons are much larger than their bite-size counterparts. The traditional bite-size macarons at Pierre Herme cost roughly $2.10 a piece.

The Plenitude: Chocolate & Caramel: Biscuit macaron chocolat, ganache au chocolat-caramel, eclats de chocolat a la fleur de sel


Mogador: Fruit de la Passion & Chocola au Lait: biscuit macaron, ganache au fruit de la passion et chocolat au lait


My personal Favorite. Rose: Biscuit macaron rose, creme aux petales de rose


One last Pierre Herme macaron. The name escapes me but it tasted even better than it looked!


An olive oil chandelier!


The french sell a huge variety of bottled water. The most popular is Vittel. This one was my favorite though. Bling H2O selling for around 36 US dollars a bottle. The "Bling" is written out in Swarovski crystals.

And last, but certainly, not least, I leave you with French CHOCOLATE!


Simple and delicious chocolate and peanut butter cookies!

This past week I found myself a bit bored one afternoon and decided to see what kind of cookies I could make with just what I had in the pantry. It seemed easiest to make a batch of what ended up being absolutely delicious chocolate and peanut butter cookies :-)
The recipe itself is very simple and uses nothing out of the ordinary. The ingredients are as follows:

1 cup all-purpose flour
1/2 tsp baking powder
1/2 tsp salt
8 tbsp unsalted butter (at room temperature)
1/2 cup firmly packed dark brown sugar
1/3 cup granulated sugar
1 tsp pure vanilla extract
1 large egg, lightly beaten
1/2 cup chunky peanut butter, preferably natural
1 ounce 99% unsweetened chocolate, melted
6 ounces 62% semisweet chocolate, chopped into 1/4-inch pieces


In terms of the above ingredients, we did deviate slightly since we wanted to use things we had. Instead of dark brown sugar, we used lite. Instead of 99% unsweetened chocolate, we used a 75% variety. Lastly, we used jumbo bittersweet chips instead of breaking a block into smaller chunks. The cookies still came out delicious, but I'd be interesting in sticking literally to the recipe as well to see if the darker flavors make a difference.

Preheat the oven to 325 and line a 17x12x1 baking sheet with parchment paper.

In a small bowl combine the flour, baking powder, and salt and set aside.

In your kitchen aid (of mixing bowl) combine the butter, brown sugar, and granulated sugar and mix on medium to blend, 1 to 2 minutes. Add the vanilla, egg, and peanut butter and mix for 2 more minutes. Pour in the melted chocolate and mix until just combined. Stop the mixer, then add the dry ingredients, save the bittersweet chocolate pieces.

Remove the bowl from the mixer and fold in the chocolate pieces.

Drop large mounds of dough, about 3 or 4 heaping tbsps each, onto the prepared baking sheet with about 2 inches in between each blob. Bake for about 20 minutes, or until the cookies are lightly cracked on top, rotating the pans halfway through. Remove from the oven and cool on the sheets, then on a cooling rack to cool completely.

Last but not least enjoy!

Wednesday, February 25, 2009

Wagamama (Prudential Center)

Today, I went for a quick bite to Wagamama in the Prudential Center with my friend Randy. I had only been to one Wagamama before and it was in London. From what I remembered, Wagamama was a relatively inexpensive noodle house that proved to be a good time so I was anxious to try out their new second Boston location. Wagamama is open and airy with long wooden tables laid down in rows, not much fuss or muss about the place. This sparser atmosphere works well and lends a clean, modern, and comfortable feel to the restaurant.

We were quickly greeted at the door by a nice woman who brought us to our table. At Wagamama, there is a chance that you could end up sitting right next to someone you don't know since the tables hold at least 20 people. Tonight wasn't extremely crowded so we were able to secure part of a table that was a bit away from people. For drinks, we both ordered Japanese beer. I ordered the Tiger Beer,billed as "a premium beer from the far east with a full flavour and refreshing taste" it was just as it was described, a pretty darn good light beer (with a cool label). Randy got the Kirin Ichiban premium beer, "the fine aroma of hops and joponica rice provides its lighter body and delicate aftertaste". Randy said he enjoyed it very much although I did note it had a bit of a bitter aftertaste compared to the Tiger Beer. (Something I did notice is that no one at the restaurant had a glass of water...not sure if you specifically have to ask or if it costs extra.)

For an appetizer we got a bowl of edamame. Edamame is steamed green soybeans. Ours were covered in salt and chili pepper (just lightly) and they were great. A good snack before our main course.

For our entrees, I ordered the simple Chicken Ramen ($9.50). The Chicken Ramen is "soup and ramen noodles topped with a marinated and grilled chicken breast, seasonal greens, menma and sliced scalion." When it arrived it came with chop sticks and a small ladle that I wasn't quite sure how to use. I enjoyed the Ramen. It was simple but fresh and the noodles were soft and good. The broth wasn't as salty as ramen you buy in the store but I think that's definitely a good thing! The best part? I got to slurp up the liquid at the end right from the bowl!


Randy ordered the more complex chicken chili men, "stir-fried chicken, squash, red onion, peppers, snow peas and scallion served with wheat noodles in a chili sauce made from chilies, ginger, garlic, onion, lemongrass, sweet red pepper and tomato. It was a bit spicy for me but had a good flavor to it and had a familiar tomato sauce taste.

One thing Randy pointed out to me was that at Wagamama, they bring your food out right when it's done so sometimes not everyone is fed at once. This isn't a huge problem since most of the food arrives within 5 minutes of ordering.

I really enjoyed Wagamama. It had a fun crowd from young college students to fancily dressed older women, friends and couples. The wait staff was super friendly and super fast. They even bring the credit card machine right to your table so you don't have to wait too long for the bill. I would definitely recommend Wagamama for a fun quick bite with friends.

Wagamama on Urbanspoon

Tuesday, February 24, 2009

Galette des rois

Happy Mardi Gras!

For the occasion, I decided I wanted to make a King's Cake for the office...but I wanted to make my favorite: the Parisian-style galette des rois.

This delicious, flaky creation filled with almond paste is traditionally enjoyed at Epiphany, but that didn't stop me!


Galette des rois

Ingredients:

1/4 cup almond paste
1/4 cup white sugar
3 Tbsp unsalted butter, softened
1 egg
1/4 tsp vanilla extract
1/4 tsp almond extract
2 Tbsp all-purpose flour
1 pinch salt

1 (17.25 oz) pkg. frozen puff pastry; thawed

1 fève (or you could substitute a dry kidney or fava bean)
1 egg; beaten (for egg wash)
1 Tbsp powdered sugar (for dusting)


Note: I didn't have any almond paste (and the store was already closed), so I just made my own using the pulverized almonds from Trader Joe's that I was talking about in my last post and some additional sugar and almond extract. After pulsing this together in the food processor, it came out quite nicely.

1. Follow instructions on packaging to properly thaw your puff pastry.

2. Add the almond paste, sugar and butter to the food processor and process until ingredients are incorporated and smooth. Add egg, flavorings, salt, and flour. Blend. Set aside.

3. Preheat oven to 425ºF (220ºC). Prepare a baking sheet by buttering or lining with parchment paper or a Silpat.

4. One sheet at a time, roll-out the puff pastry into about a 11-inch square being careful not to manipulate it too much and avoiding letting it get too warm. Using a large plate, etc. as a template (Ha! temPLATE!) cut out the pastry into a circle. Place on prepared baking sheet and refrigerate while preparing the 2nd sheet of puff pastry.

5. Take 1st sheet of pastry out of fridge. Spread the almond paste mixture into the center of the circle leaving about an inch margin around the edge. Press the fève down into the almond mixture. Place the 2nd sheet of puff pastry on top and crimp edges to assure a good seal. (I use a fork to crimp, then push the edges back towards the center to make the galette nice and round and the edges less flat.) Brush on the egg wash. (Optionally, you can make a little design in the egg wash by drawing lightly onto the top sheet with a chopstick.) With a small knife, prick a few vent holes.

6. Bake for 15 minutes in the hot oven--making sure not to open the oven during this time! Remove from oven after 15 minutes and dust with powdered sugar. Return to oven for another 10-15 minutes--depending on your oven--until the top is a nice, golden brown.  Remove from oven and let cool on a wire rack.


Whoever finds the fève is king/queen of the party! If you have a paper crown, that makes it even more fun.

Laissez les bons temps rouler!